


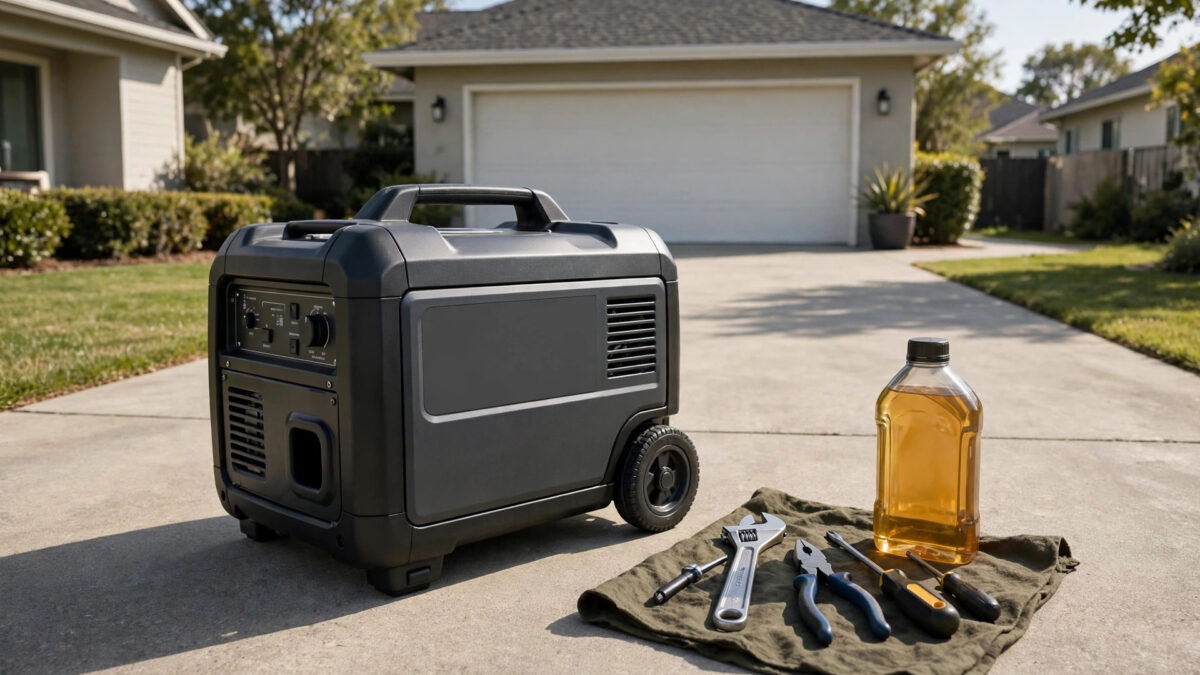
Here is how to break in a new generator: run it through a controlled first-use sequence: add the correct oil, use fresh fuel, start it and let it warm up unloaded, then run it for several hours under light-to-moderate varying loads before doing the first oil change. The full break-in typically takes 5 to 25 hours of runtime depending on the manufacturer — your owner’s manual states the exact interval. Done right, break-in seats the piston rings, flushes manufacturing residue out with that first oil change, and sets the engine up for a long, reliable life.
Key Takeaways
- Breaking in a new generator means controlled early running — varying light-to-moderate loads, no sustained full load — for the first 5–25 hours (check your manual).
- Always add engine oil before the first start; generators ship dry, and starting without oil can destroy the engine in minutes.
- Change the oil after the break-in period — the first oil change removes metal particles and residue from manufacturing.
- Use fresh, correct fuel and follow the manual’s oil type and capacity exactly; “close enough” is not good enough during break-in.
- Keep a simple runtime log during break-in so you know exactly when the first oil change and the switch to normal service intervals are due.
Why Does a New Generator Need a Break-In Period?
A new generator engine has fresh, precisely machined internal parts — piston rings, cylinder walls, bearings — whose surfaces have never mated under load. During the first hours of operation, these surfaces wear into each other microscopically, establishing the seals and clearances the engine will live with for its entire life. Gentle, varying loads during this period let the rings seat evenly against the cylinder wall; hammering a brand-new engine at full load can glaze the cylinder, leaving the rings poorly sealed — which shows up later as oil consumption, lost compression, and hard starting.
Break-in also serves as the engine’s first flush. Manufacturing leaves behind microscopic metal particles, assembly lubricants, and casting residue. The first oil change — done at the end of the break-in interval — carries all of that out. Skip it or delay it, and those particles keep circulating through bearings and journals. Manufacturers specify break-in procedures for a reason, and following them is the cheapest longevity insurance you will ever buy.
How to Break In a New Generator: Pre-Start Setup
Most break-in failures happen before the engine ever turns over — wrong oil, no oil, stale fuel, or a missed setup step. Slow down and do this part deliberately.
Step 1: Read the manual’s break-in section first
Every manufacturer publishes its own break-in interval and first-oil-change schedule — commonly the first oil change at 20–25 hours for many portables, or as early as 5 hours on some inverter models. Your manual overrides everything in this guide. Note three numbers before you start: the oil type and capacity, the break-in hours, and the first oil change interval.
Step 2: Add engine oil — the generator ships dry
This is the step that destroys engines when skipped. Portable generators almost universally ship without oil in the crankcase. Add exactly the oil type and quantity the manual specifies (commonly 10W-30, but follow your manual), check the dipstick without screwing it in unless the manual says otherwise, and confirm the level is correct. Some units include a low-oil shutdown sensor — do not rely on it as your oil check.
Step 3: Add fresh fuel
Use fresh gasoline of the octane the manual specifies (usually regular 87 octane), ideally ethanol-free if available in your area, or add fuel stabilizer if the fuel may sit. Check for leaks around the fuel cap, fuel valve, and carburetor after filling. For dual-fuel models breaking in on propane, confirm the hose connections are tight and leak-free.
Step 4: Set up outdoors on level ground
Place the generator outdoors on a firm, level surface, at least 20 feet from the home with exhaust pointed away from buildings. Level matters during break-in: oil must distribute correctly in the crankcase, and the low-oil sensor reads correctly only on level ground. Connect nothing electrical yet.

How to Break In a New Generator: The Step-by-Step Run
With setup complete, work through the first-use sequence. The whole process spans a few sessions — you do not need to do it all in one day.
Step 5: First start and warm-up (no load)
Turn the fuel valve on, set the choke per the manual (usually full choke for a cold start), and start the engine. Let it run unloaded for 5–10 minutes so oil circulates fully and the engine reaches operating temperature. Listen for anything abnormal — knocking, surging, or exhaust smoke beyond a brief initial puff — and shut down immediately if something seems wrong.
Step 6: Run under light load (first 1–2 hours)
Connect a light load — roughly 25% of the generator’s rated running watts, such as a few lights or a small fan — and run for an hour or two. The goal is gentle heat cycling, not work. Avoid eco/throttle mode extremes if the manual advises; some makers want the engine at full governed speed during break-in.
Step 7: Vary the load through the break-in hours
Over the remaining break-in hours, cycle through light-to-moderate loads (roughly 25–75% of rated running watts), changing the load every 30–60 minutes. This varying-load pattern is the heart of break-in: it works the rings through different pressures and temperatures so they seat evenly. Run a space heater for a while, switch to lights and a fan, add a power tool briefly — variety is the point.
Step 8: Avoid sustained heavy loads
Do not run the generator at or near full rated load for extended periods during break-in, and avoid very long continuous runs at one fixed load. Short bursts toward higher load are generally acceptable per most manuals, but sustained maximum output is exactly what break-in is meant to postpone until the engine is seasoned.
Step 9: Track your hours
Log each session’s runtime — a notebook, a phone note, or the generator’s hour meter if equipped. You need an accurate total to hit the first oil change on schedule. This log becomes the start of your maintenance records, which help with warranty claims and resale alike.
The First Oil Change: The Most Important Service of Its Life
When you reach the manual’s break-in interval, change the oil — even if the oil “looks fine.” It is not fine; it is carrying the wear particles of the engine’s first hours.
Step 10: Warm it up, then drain
Run the generator for a few minutes to warm the oil (warm oil drains faster and carries more suspended particles), then shut it off. With the unit on level ground, remove the drain plug or tilt per the manual’s procedure, and drain into a proper container. Expect the used oil to look darker than you would expect for so few hours — that is normal and exactly why you are changing it.
Step 11: Refill with the specified oil
Refill with the exact oil type and quantity from the manual, check the dipstick, and inspect for leaks. Dispose of used oil at an auto parts store or municipal collection point — never down a drain or into the trash.
Step 12: Inspect everything else while you are at it
Check the air filter for debris, confirm all bolts and fasteners are tight (vibration loosens things on new units), inspect the spark plug wire connection, and look over fuel lines for any weeping. A new generator that has just finished break-in should look and sound settled — smooth idle, clean exhaust, no new rattles.
| Break-in milestone | Typical timing (confirm in your manual) | Action |
|---|---|---|
| Pre-start | Hour 0 | Add specified oil and fresh fuel; set up outdoors on level ground |
| Warm-up | First 5–10 minutes | Run unloaded; check for abnormal noise, smoke, or leaks |
| Light load | Hours 0–2 | ~25% load; gentle heat cycling |
| Varying load | Hours 2 through break-in end | Cycle 25–75% loads every 30–60 minutes |
| First oil change | 5–25 hours (per manual) | Drain warm, refill to spec, inspect fasteners/filter/plug |
| Normal service | After first oil change | Follow the manual’s regular oil and maintenance intervals |
Common Break-In Mistakes to Avoid
We researched owner feedback across forums and reviews, and the same break-in mistakes appear again and again. Avoid all five:
Mistake 1: Starting it with no oil
The number-one killer of new generators. “It came with a bottle of oil in the box” does not mean oil is in the engine. Check the dipstick before every first start of a new unit — no exceptions.
Mistake 2: Running full load immediately
Plugging in the whole house (or the RV air conditioner plus everything else) on hour one defeats the purpose of break-in and risks glazing the cylinder. Patience for the first several hours pays off for years.
Mistake 3: Skipping the first oil change
“I’ll just change it at 50 hours like normal” leaves break-in debris circulating through the engine’s most vulnerable period. The first change is on a shorter interval than every change after it — honor that.
Mistake 4: Using stale or wrong fuel
Last year’s gas can, or the wrong octane, causes hard starting and rough running that owners blame on the generator. Fresh, correct fuel is a break-in requirement, not a nicety.
Mistake 5: Breaking in indoors or in the garage
It happens more than anyone admits — “just a quick test in the garage with the door open.” CO builds to lethal levels in minutes in enclosed spaces. Every start, including test starts, happens outdoors.
How long does it take to break in a new generator?
Do you need to break in an inverter generator?
What kind of oil should I use to break in a generator?
Can I run my generator at full load during break-in?
What happens if you don’t break in a generator?
Do generators come with oil already in them?
Conclusion
Breaking in a new generator is a small upfront investment — a few hours of patient, varying-load running plus one early oil change — that pays dividends across the engine’s entire life. Add oil before the first start, keep loads light and varied, log your hours, and change that first fill of oil on schedule. Do those things and your generator will start reliably and run strong when the outage actually comes. Next, set up a maintenance routine so the unit stays ready: our generator maintenance checklist covers oil intervals, filters, and storage between uses.

Related Guides
How to Store a Generator Long-Term: Fuel, Battery & Winterization Checklist
How to store a generator long term: fuel stabilizer vs draining, oil change, fogging oil, battery care, winterization extras, plus a printable checklist.

Can You Run a Generator in the Rain? What Is Safe & What Is Not
Can you run a generator in the rain? Only under a proper cover. Learn the safe setups, the deadly mistakes to avoid, and when to shut down in severe storms.
How to Parallel Two Inverter Generators: Safety & Setup Guide
How to parallel two inverter generators safely: compatibility rules, the right parallel kit, step-by-step setup, wattage math, and key safety warnings.